

How To Draw A 3d Building
In this building design tutorial, concept artist Samantha Kung demonstrates how to incorporate 3D models to build in the right perspective. From silhouette thumbnails to painting in textures and small details, she uses the case of a fantasy blacksmith workshop to demonstrate the main themes.
In this tutorial, I will share the process of creating a fantasy blacksmith workshop from brainstorming to completion, besides as some techniques of rendering different materials.
Brainstorming
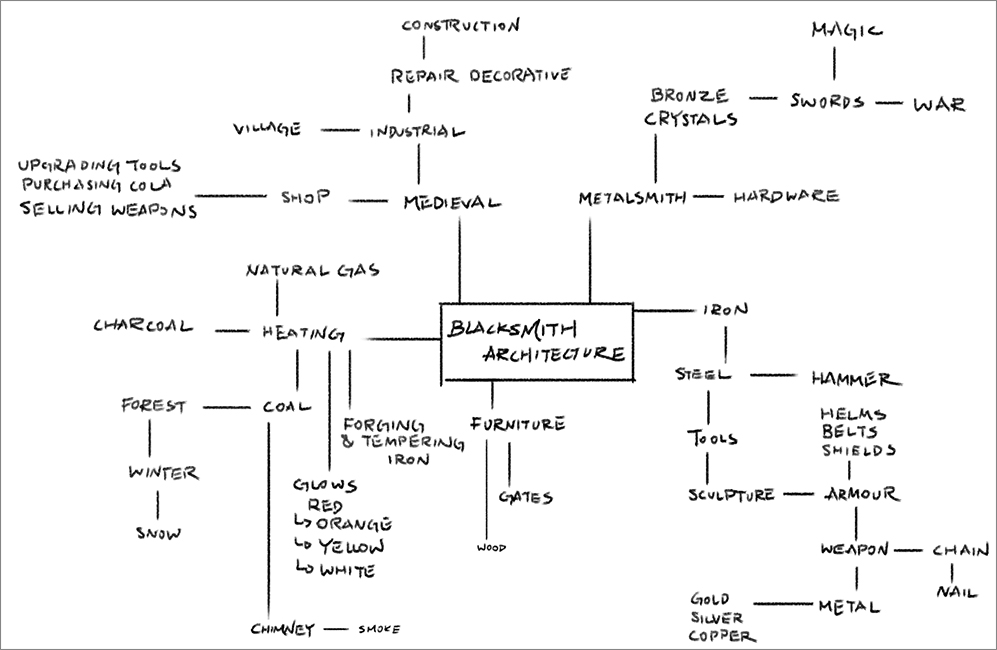
The first stage of any project is to practice brainstorming and analyze the themes. Since I am going to design a fantasy blacksmith workshop from the medieval period, I offset researching the functions of a blacksmith workshop, writing keywords, and expanding the ideas outward.
References
After that, I start looking for references. It is ever groovy to take your ain photos and to go to real places to get a feel of the environs. All the same, at that place are no blacksmith workshops in my area, and so I collect the information and references on Google and Pinterest past typing the keywords like "blacksmith architecture." Although I'm only designing the exterior, I also assemble some interior photos to get a ameliorate understanding of how blacksmiths arrange their tools in their workspace, every bit well as to analyze the architectural materials. The building is mainly synthetic from concrete, brick, stone, and wood, which I will apply to my last design later.
Silhouettes
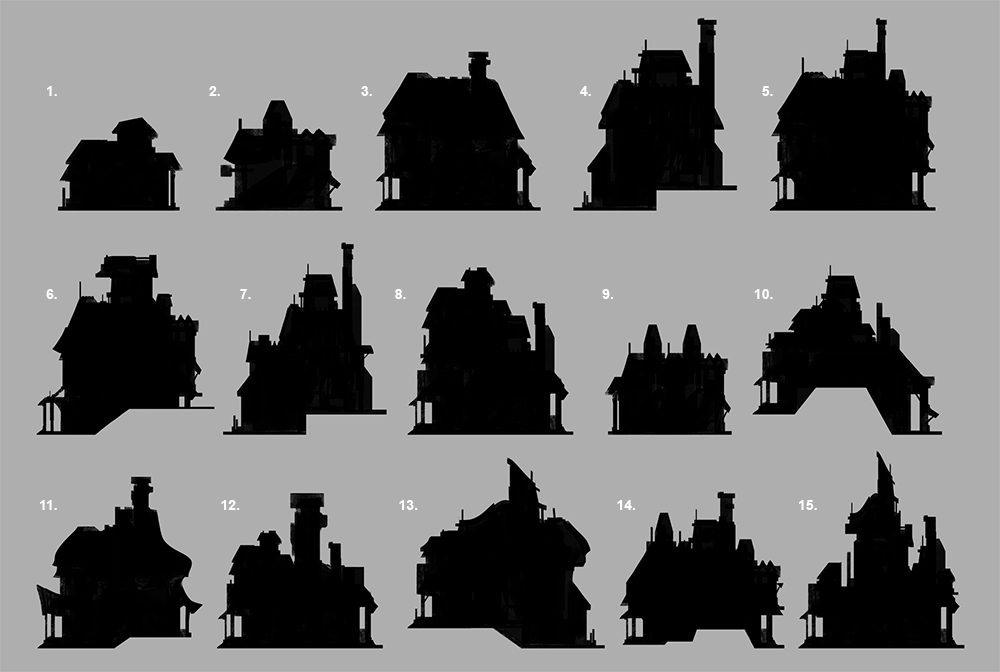
Later on gathering all the basic information, I then beginning sketching and creating silhouettes. While doing the sketches, I keep these things in listen:
- How many levels does the building have?
- Is it located on a steep slope or apartment land?
- Class Follows Office: It is necessary to include archway(south), chimney(s), and roof(southward).
Rough Sketches
I choose 5 silhouettes from the above and add details, considering the principal structure and different parts of the compages. Although they look flat, drawing the side views first can requite me a amend idea of exploring the outside blueprint, picturing the facade of a business firm.
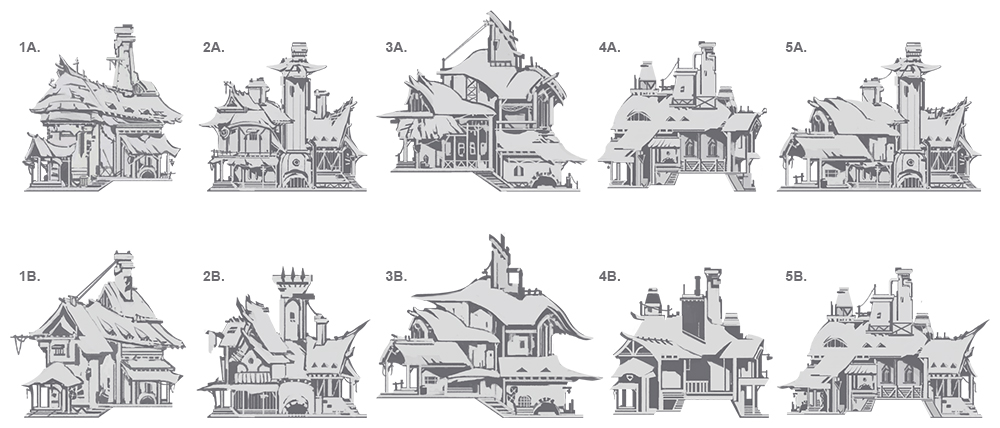
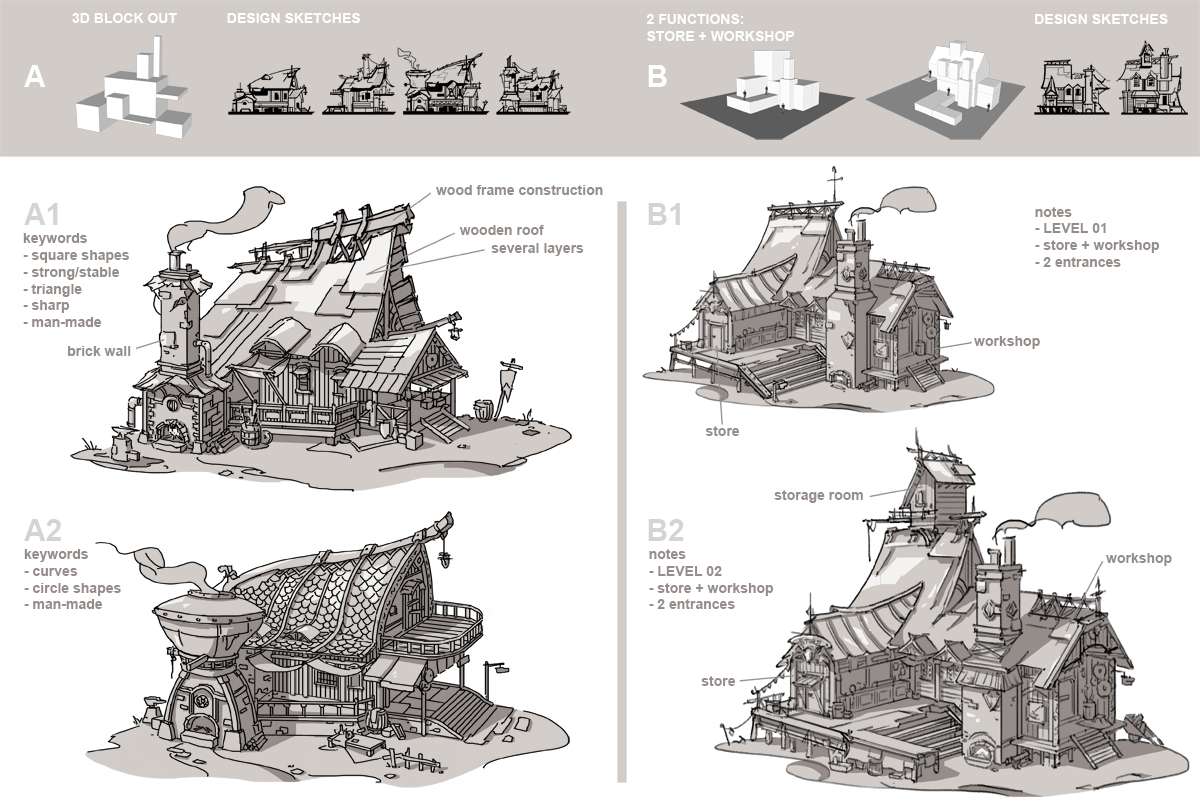
Thumbnails
The forms and proportions are still changeable, so it is better to focus on design and solve design bug at this phase. I build a uncomplicated 3D model in SketchUp to get the basic form. Before creating thumbnails, I write downwardly several keywords beginning to requite me a articulate mind of the design features as well every bit considering the cloth choices. In department A, I want the blacksmith building to look uncomplicated and have the basic features. And for section B, I add more than functions: shop (selling appurtenances and weapons) + workshop, adding an outdoor trading space.
Click to expand paradigm
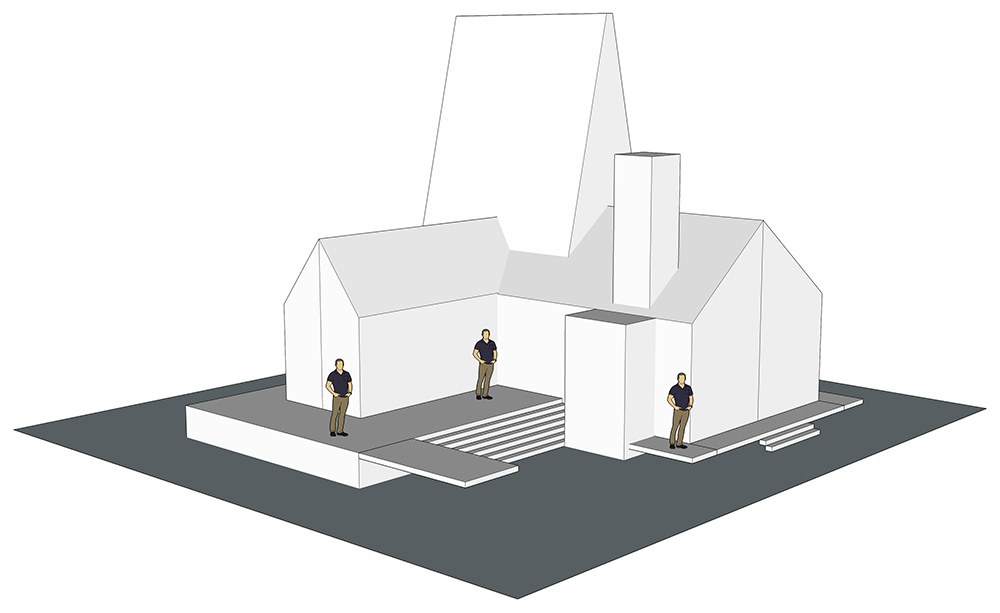
Block-out Final Shapes
Having created the thumbnails, I moved on to the final blueprint, plotting out the bones form and shape in SketchUp, importing human dummies for scale. Information technology is necessary to brand certain all the objects we interact with every 24-hour interval are in a reasonable size.
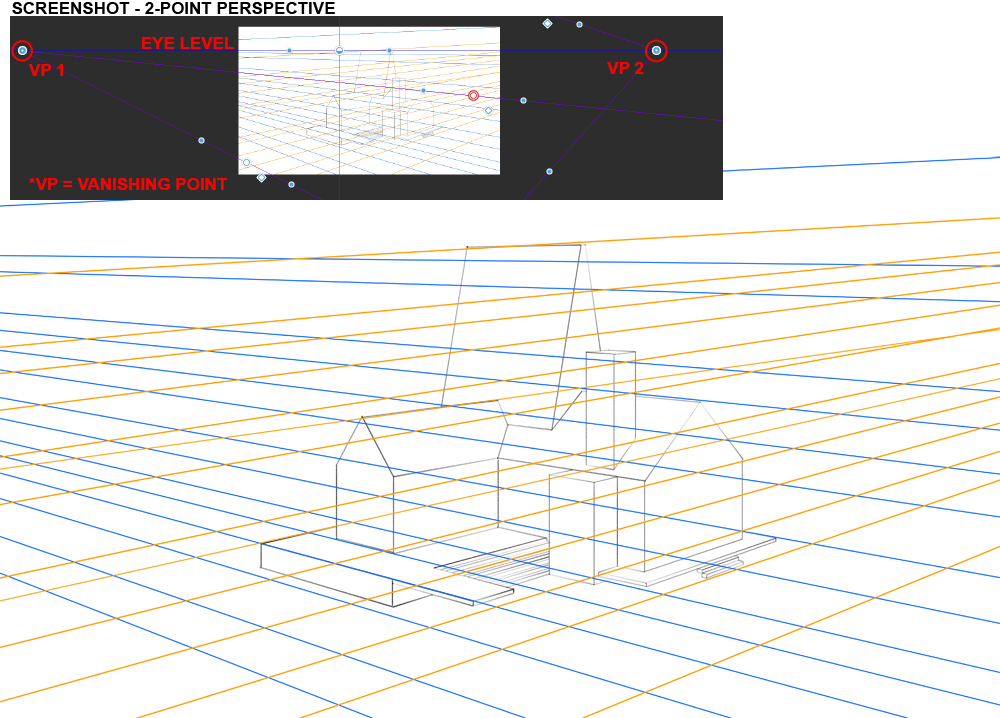
Ready Up Perspective Lines
In one case the 3D model is done, I fix up the two-point perspective for the side by side step to make sure all the details I will draw later are in authentic perspective. Firstly, I depict a horizon line below eye level, so that the peak of the edifice will be visible. Next, place the vanishing points (VP1 & VP2) on the horizon line using a small dot. Note that both vanishing points are out of the canvas. The final footstep is to extend the lines from each vanishing point. When I've finished setting up the perspective lines, it is fourth dimension to showtime adding boosted details.
Note:
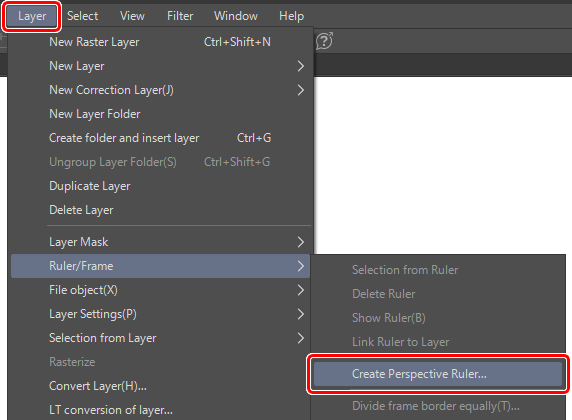
Clip Studio Paint includes a perspective ruler tool for utilize creating concept art and comics. You can set up the perspective ruler so that your lines automatically snap to the correct perspective.
Simply get the the Layer bill of fare > Ruler/Frame > Create Perspective Ruler to gear up a two-betoken perspective ruler to assist your composition.
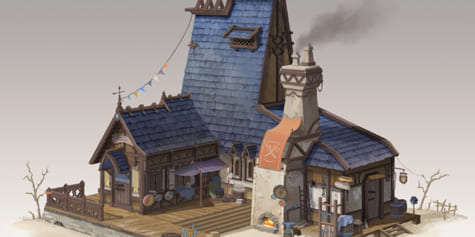
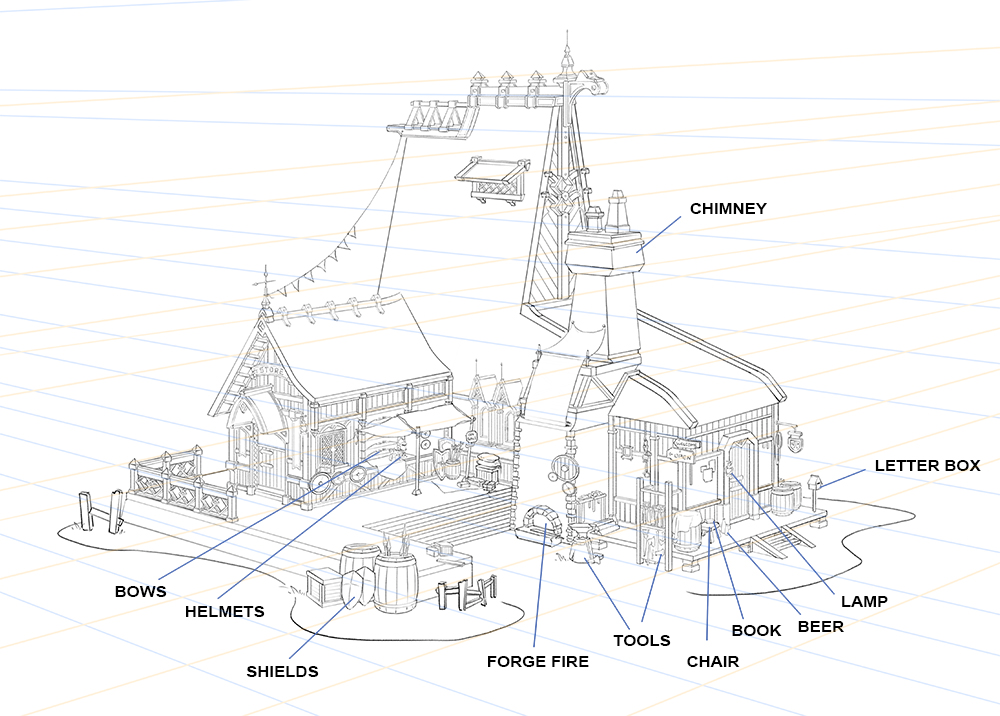
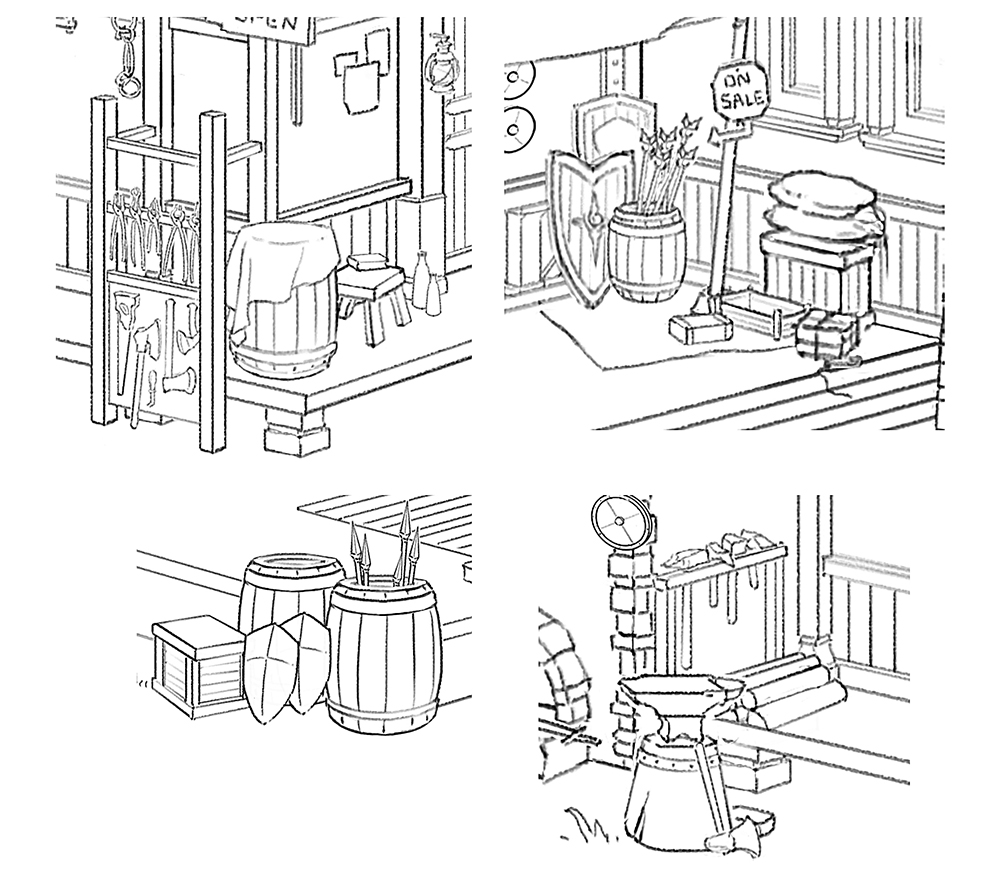
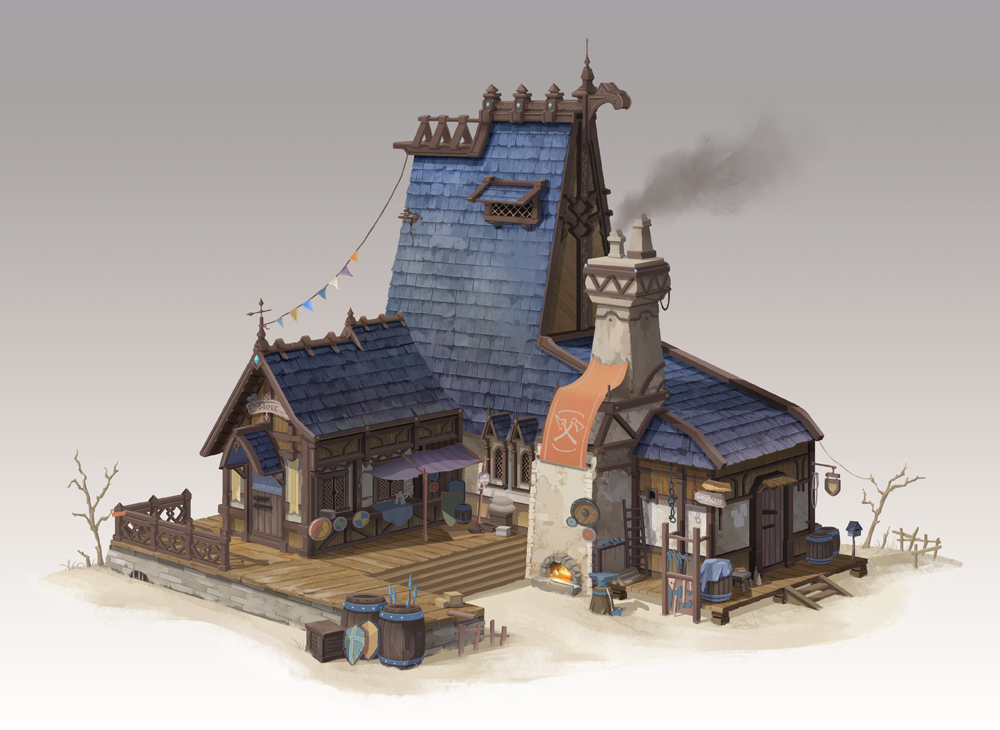
Typhoon Design
I farther develop the B2 thumbnail. My idea is to create a blacksmith building that is located in a dry area and to sketch out the overall layout of how people collaborate in the space and become about their daily lives. Adding small details next to the building makes the blueprint look more complete and makes it easier to empathize the environment of where the blacksmiths piece of work.
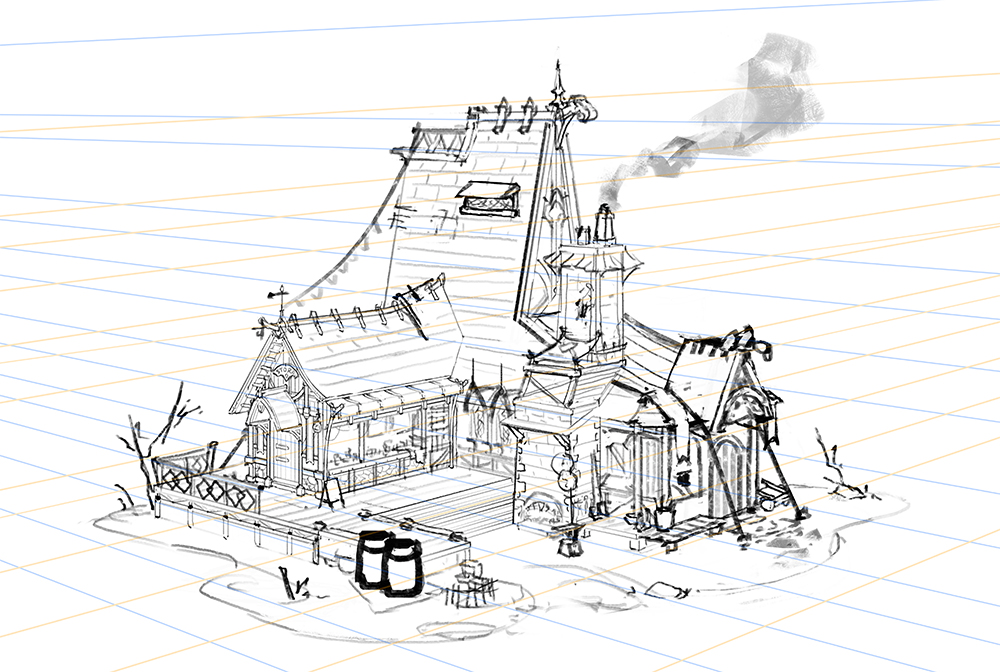
Terminal Lineart
After sketching the draft, I finalize the line piece of work, thinking almost the architectural structure and the details of the small objects.
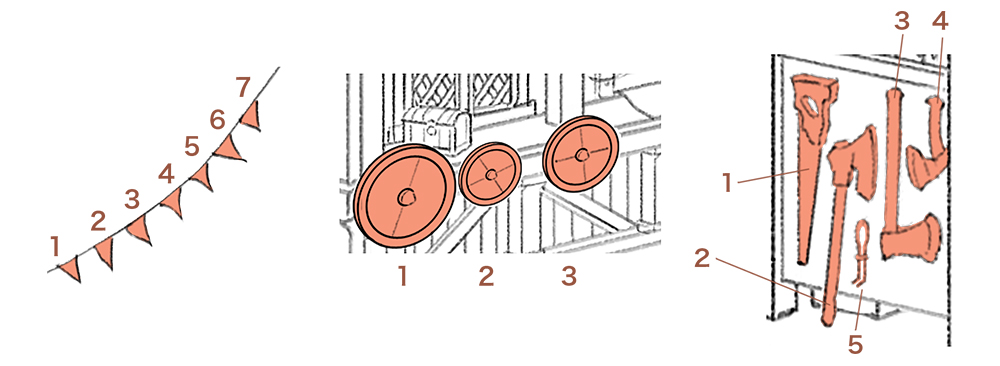
Pattern Principles
Design principles are all most contrast and the theory of Large, Medium and Small.
1. Detailed Areas VS Rest Areas
Balance the detailed and rest areas in the overall design, giving the viewer's eyes places to rest.

2. Overlap / Avoid Tangents
Pay attending to any overlapping edges and make it clear which shape is in front and which is behind.
3. Repetition
Odd numbers create visual interest and give variety, while even numbers create symmetrical balance.
Material Studies
These photo references were taken by me while travelling. Studying materials helps you visualize texture and more closely explore the differences between materials. Each material has unique surface that captures lighting differently too. The more than I understand a fabric, the easier information technology is to recreate it in the rendering process.

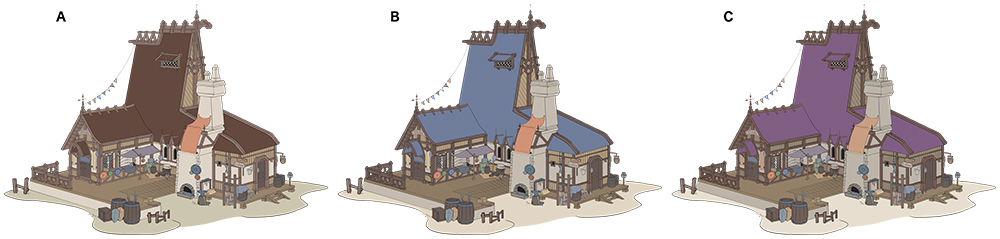
Colour Sketches
I create color sketches before moving on to rendering. For option A, everything is in the aforementioned color value, which I find a bit tiresome and lacking interest, while for choice C, I am not quite satisfied with the imperial as the color looks too saturated. Therefore, I somewhen choose B from these three options as the blue looks most harmonious to me.
Click to expand image
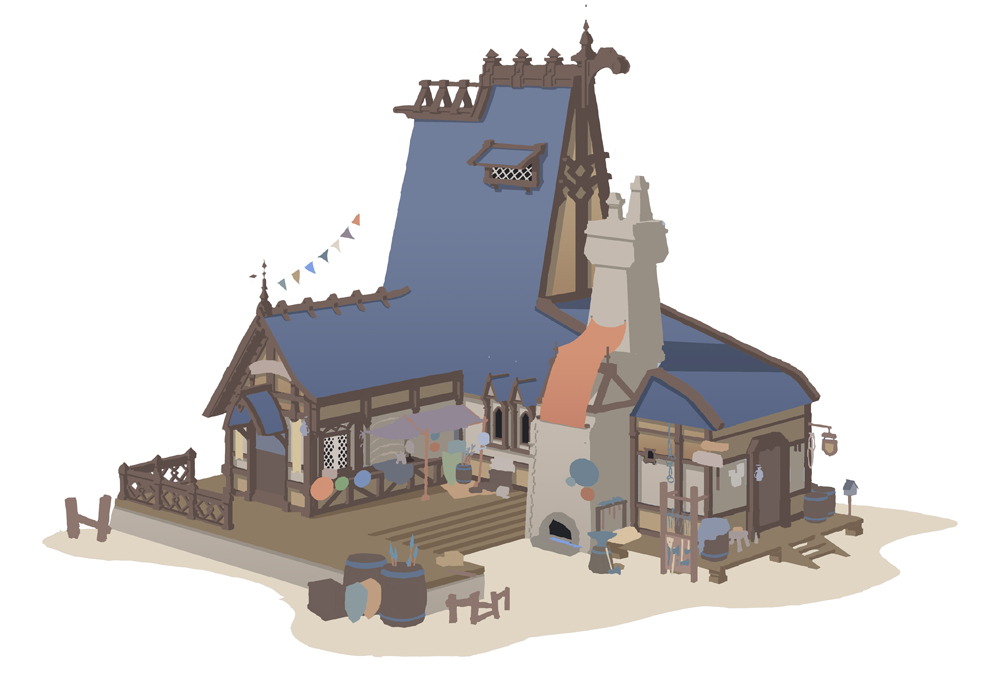
Base Color
After picking the base color, I clean upwards the layers, separating each object into a different layer, renaming the layers too. By doing and then, the rendering later on will exist easier. Once I am done with the layers, I'm ready to remove the lineart.
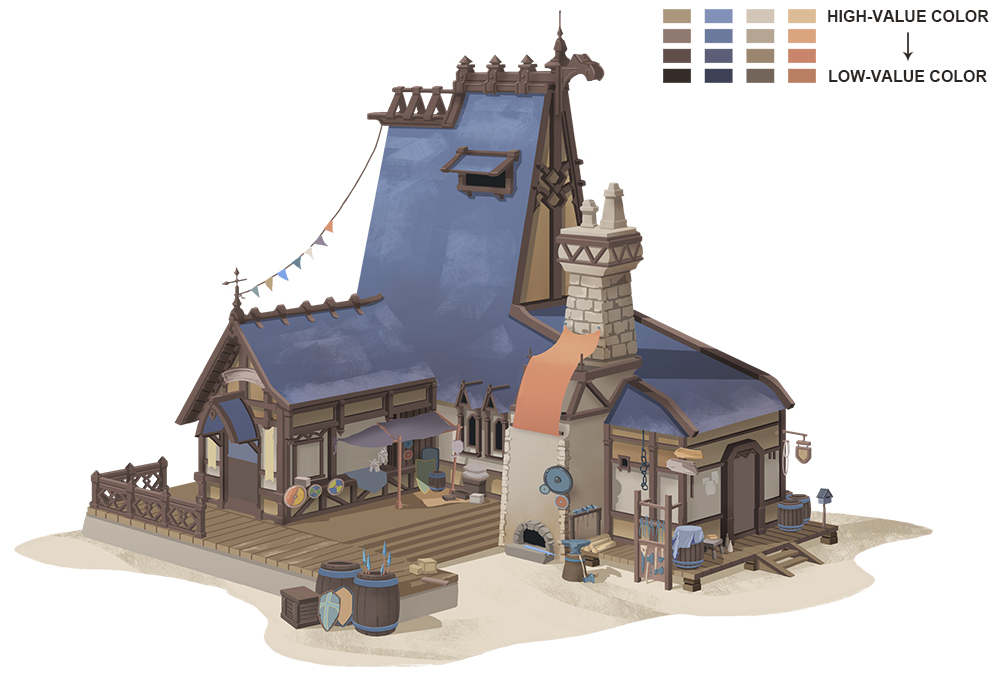
Add Shadow and Lights
At this phase, I utilise the eyedropper tool to choose colors in color palette, rather than using the blending modes for the shadow and lights. It is sometimes challenging to control the colour with blending modes as it is piece of cake to make the drawing appear muddy. Usually, I create iv rectangles from loftier-value to low-value.
When I want to add color, I add some bluish to a hue and brand sure the new color coordinates match the previous one. You lot may look upward "color value guide" if yous are not sure how to choose the right colors in a color palette.
Add textures
Next, I add together textures using a mixture of photobashing (merging and painting photos into the illustration) and texture brushes. Before working on modest details, y'all should expect at the drawing as a large flick, to correct the color of the overall cartoon and use blending modes in a subtle way.
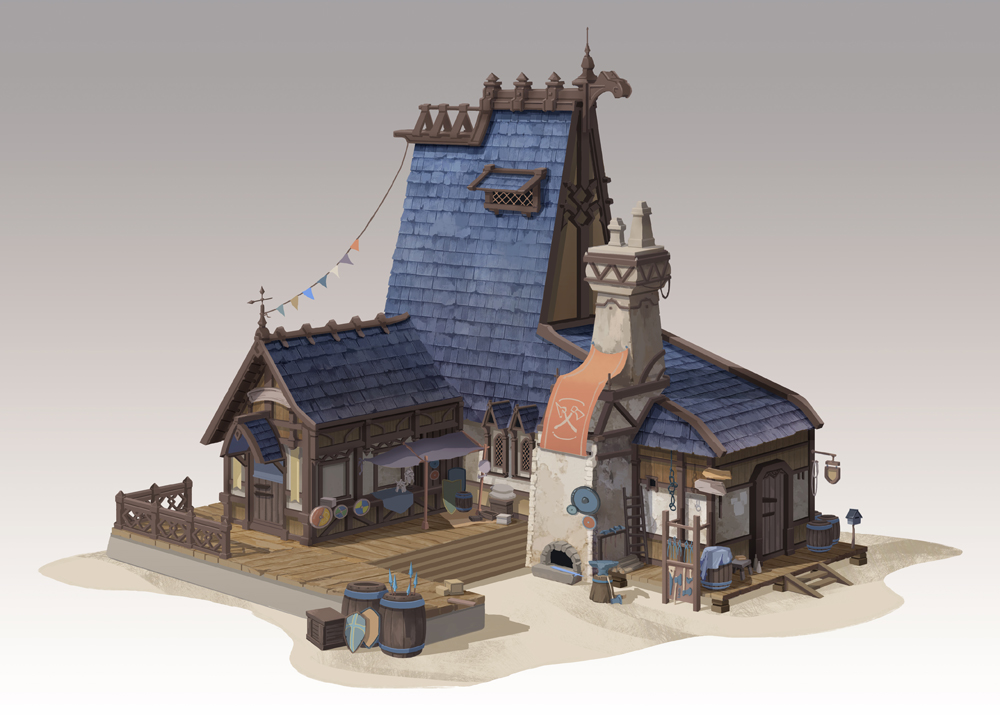
Finalize Details
The last stride is to finalize the details and add more surroundings, making sure the color value of all the objects in the unabridged drawing fit the aforementioned environment. Then it's done!

Source: https://www.clipstudio.net/how-to-draw/archives/160064
Posted by: garciahiphell.blogspot.com
0 Response to "How To Draw A 3d Building"
Post a Comment